Welcome to Cypht
Once installation is in place, the users can login the webmail using their usernames & passwords.
Once installation is in place, the users can login the webmail using their usernames & passwords.
After successfully logging in the webmail, the users will be redirected to the following home page of the webmail where the interactive interface allows user to perform multiple actions,
The users can Add an E-mail Account of any service provider to be able to access multiple inboxes from Cypht.
Enhanced customization capabilities allow user to setup, configure, and manage IMAP and SMTP or SMTP and JMAP servers and setup the ATOM/RSS Feed. Adding servers in Cypht is a straightforward process that involves two main steps. These steps are illustrated in the following image for your reference.
The advanced and most efficient service of the Cypht enables users to access multiple email accounts at the same time. The users can view inboxes of different email providers and can send, receive, and manage email messages from the interactive webmail. Also, the webmail allows provides the functionality to search, sort, and filter emails.
One-click Contact Book allows users to efficiently add people to your contacts. Contacts can be added via clicking the Contacts button from the main menu,
Or simply by clicking on the “one-person” icon in the message you receive.

The calendar feature allows user to create different events by clicking the “+” icon on top-right corner. The created reminders and events will be shown in the calendar making it easier for user to keep track of the special events.
The webmail offers simple and interactive interface to compose and send an email message from any of the added email accounts along with the functionalities to access draft emails by clicking the “document” icon on top-right corner, add signatures, attachments, etc.
From webmail settings options, the user can access the feature to add numerous profiles in the webmail allowing users to combine IMAP accounts with SMTP accounts and setup signatures and reply-to details.
Another interesting feature of the open-source platform is its provision of the developer documentation and links to the source code. Thereby enabling the developer community of the webmail to actively contribute to making the platform more efficient, advanced, and reliable.
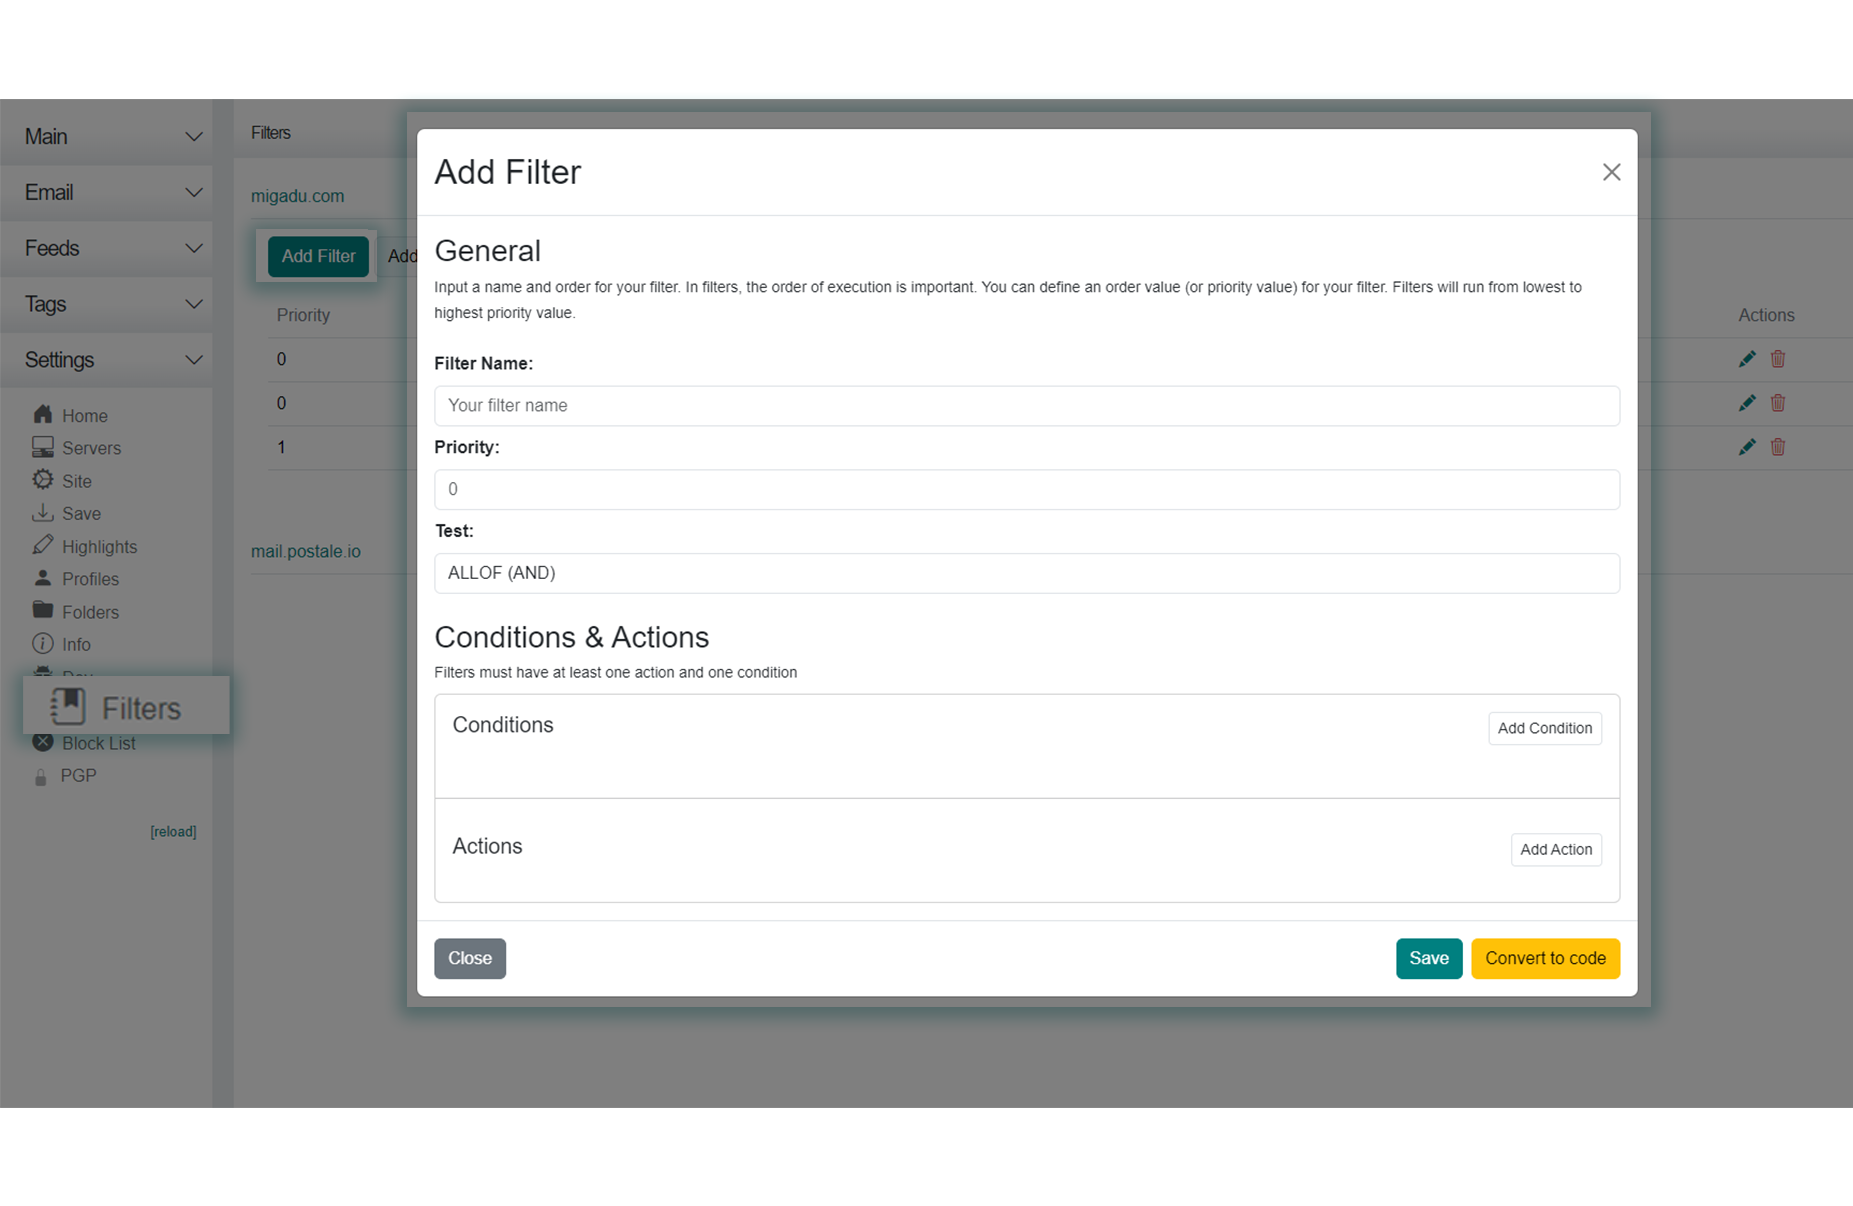
Sieve filters can be set up to automatically move, copy, or delete messages based on specific criteria such as sender, subject, keywords, or recipient. To add a Sieve filter, navigate to the Sieve Filters menu located in the Settings tab sidebar, select the email account for which you want to create a filter, and click the "Add Filter" button. Refer to the following image for a visual guide.

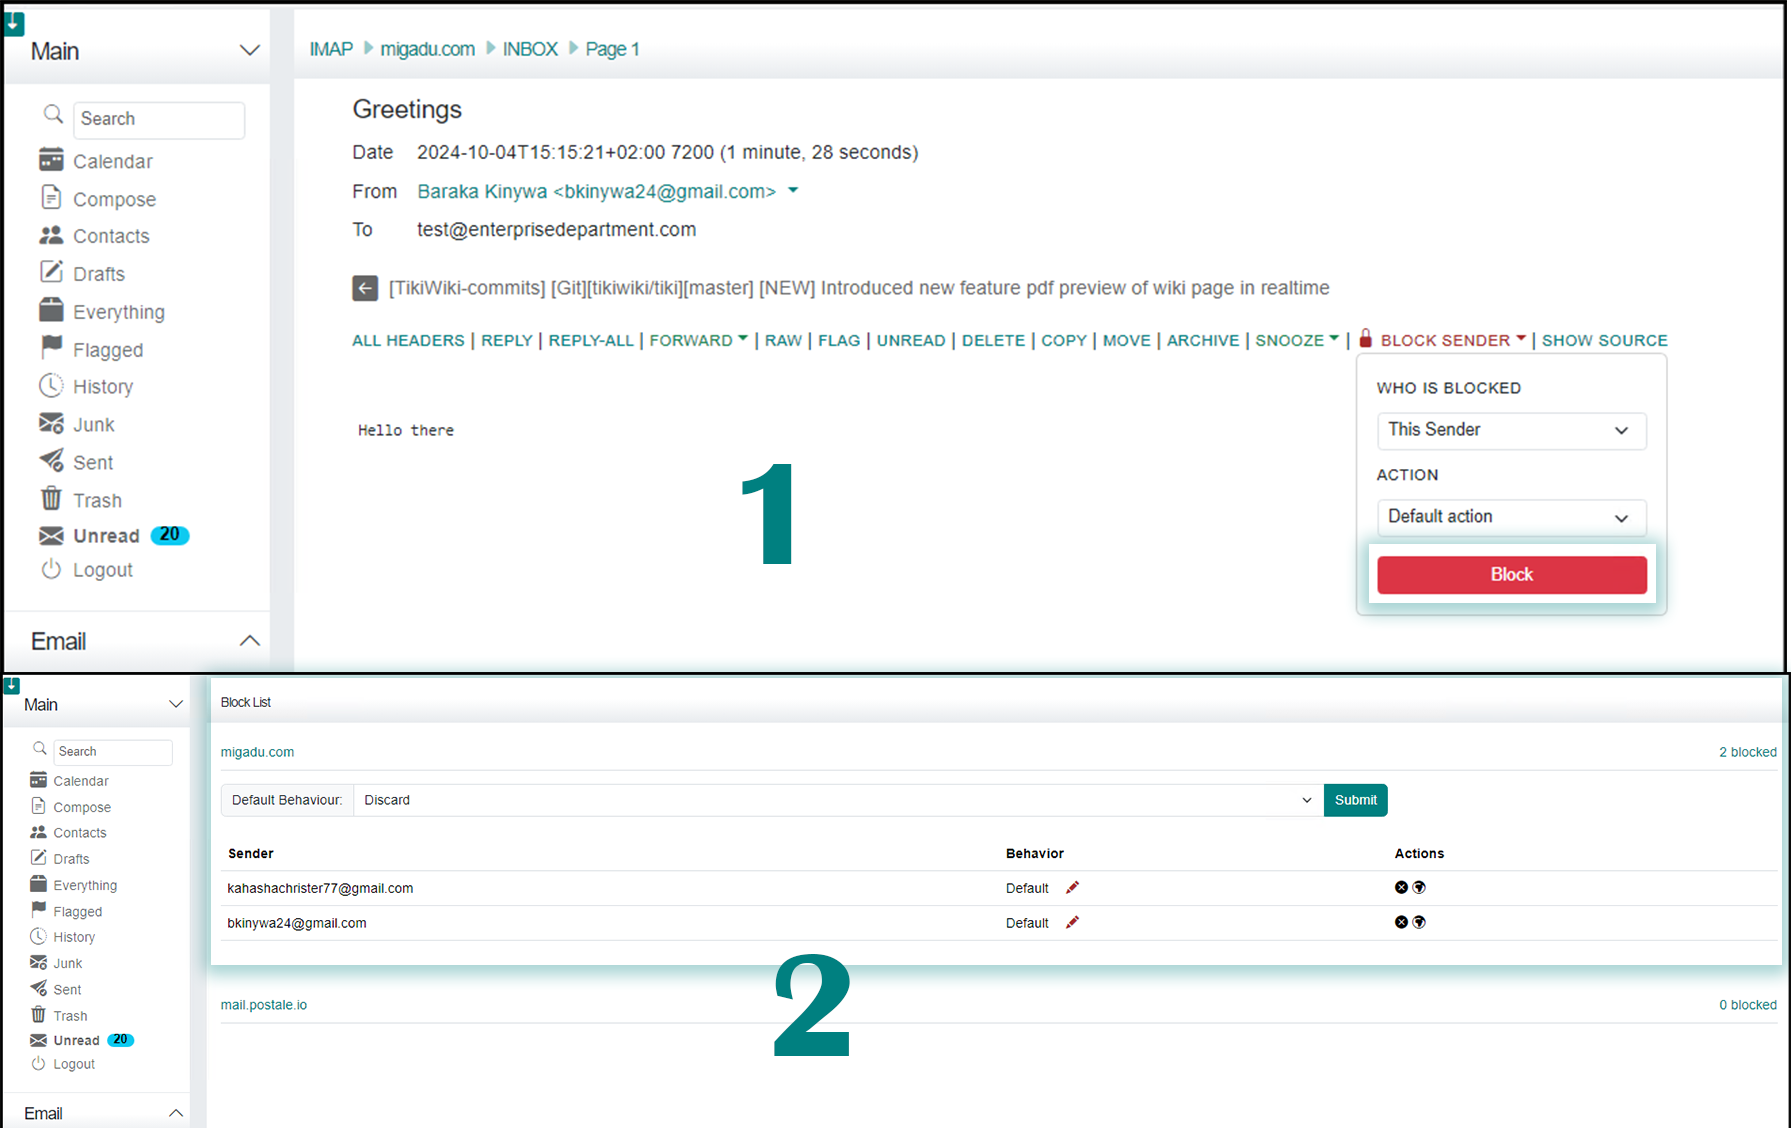
The Block List feature allows users to block specific email addresses or domains from sending emails to your inbox. To block a sender in Cypht Webmail, open the email, click the BLOCK SENDER button (lock icon), and choose whether to block This Sender or the Whole Domain. Then select an action: Default Action, Discard, Move to Blocked Folder, Reject with Default Message, or Reject with Specific Message, and confirm by clicking BLOCK. You can manage blocked senders later under Settings > Block List. Make sure Sieve filters are enabled in your Cypht settings for this feature to work. Refer to the following image for a visual guide.


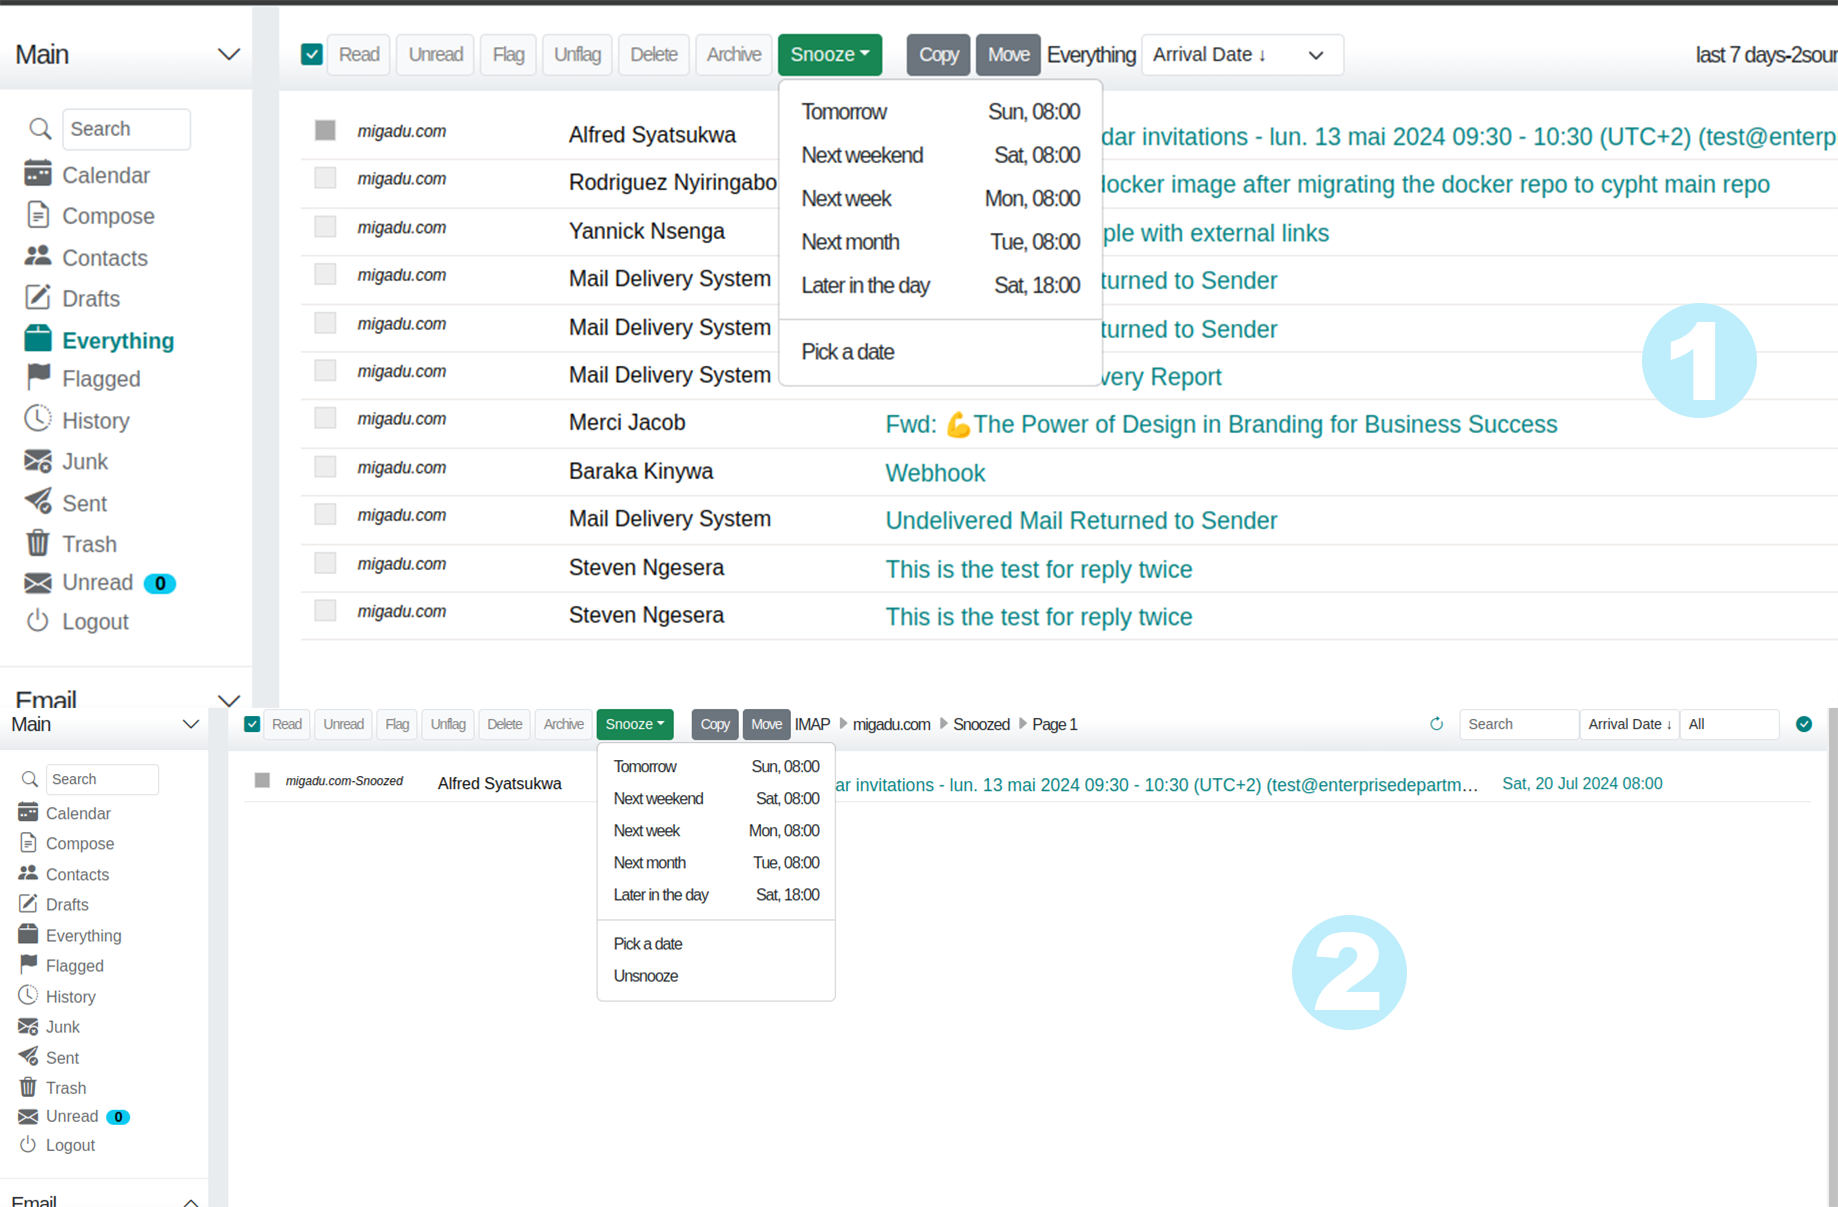
The snooze feature allows user to snooze the email with choices like 1 day, 1 week, 1 month, pick a date. The snoozed emails should all be findable in a "snoozed" folder (or similar name), with a column for the snoozed-until date. Here, you can un-snooze them (it becomes a normal email), or change the snooze date. At the end of the snooze period, the email should appear in a dedicated section above all other emails. Then, you deal with them, or snooze them again. Alternate names for this feature : Snooze,Defer,Postpone,Delay,Reminder.
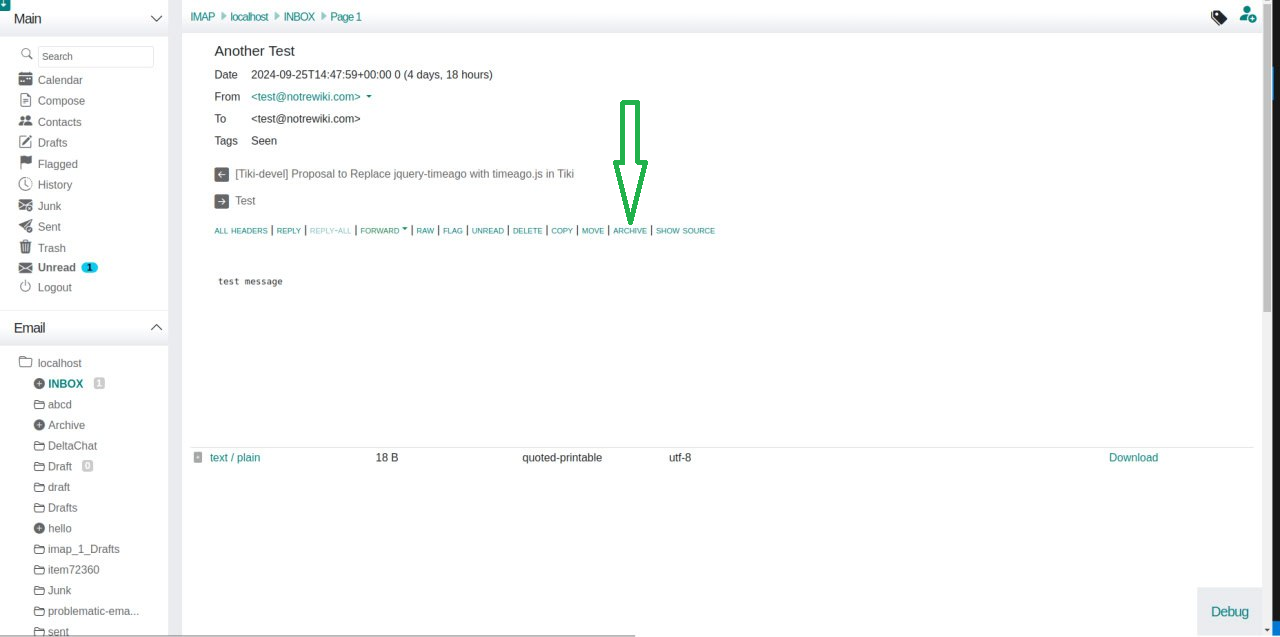
To archive emails in Cypht, you'll need to create an archive folder. The 'Archive' button is always available, but you won't be able to use it until you've set up a destination folder. Once you've done that, clicking 'Archive' will move the email to the designated folder and display a confirmation message.
